We're continuing to work on moving hospitality forward. Here are the newest features and latest enhancements to our platform. Many of these features come from you all - so thank you for continuing to help us, help you.
Gift Cards
Offering gift cards at your venue this holiday season is a fantastic way to boost sales and engage with your customers. Gift cards make for convenient, thoughtful presents for customers, while also attracting new patrons to your venue. Plus, with the ability to now sell both digital and physical gift cards through our partnership with Factor4, you’ll have a versatile tool to enhance your holiday sales strategy. Here are some key updates to our POS that will help streamline your gift card transactions.
Gift Card Updates to the POS
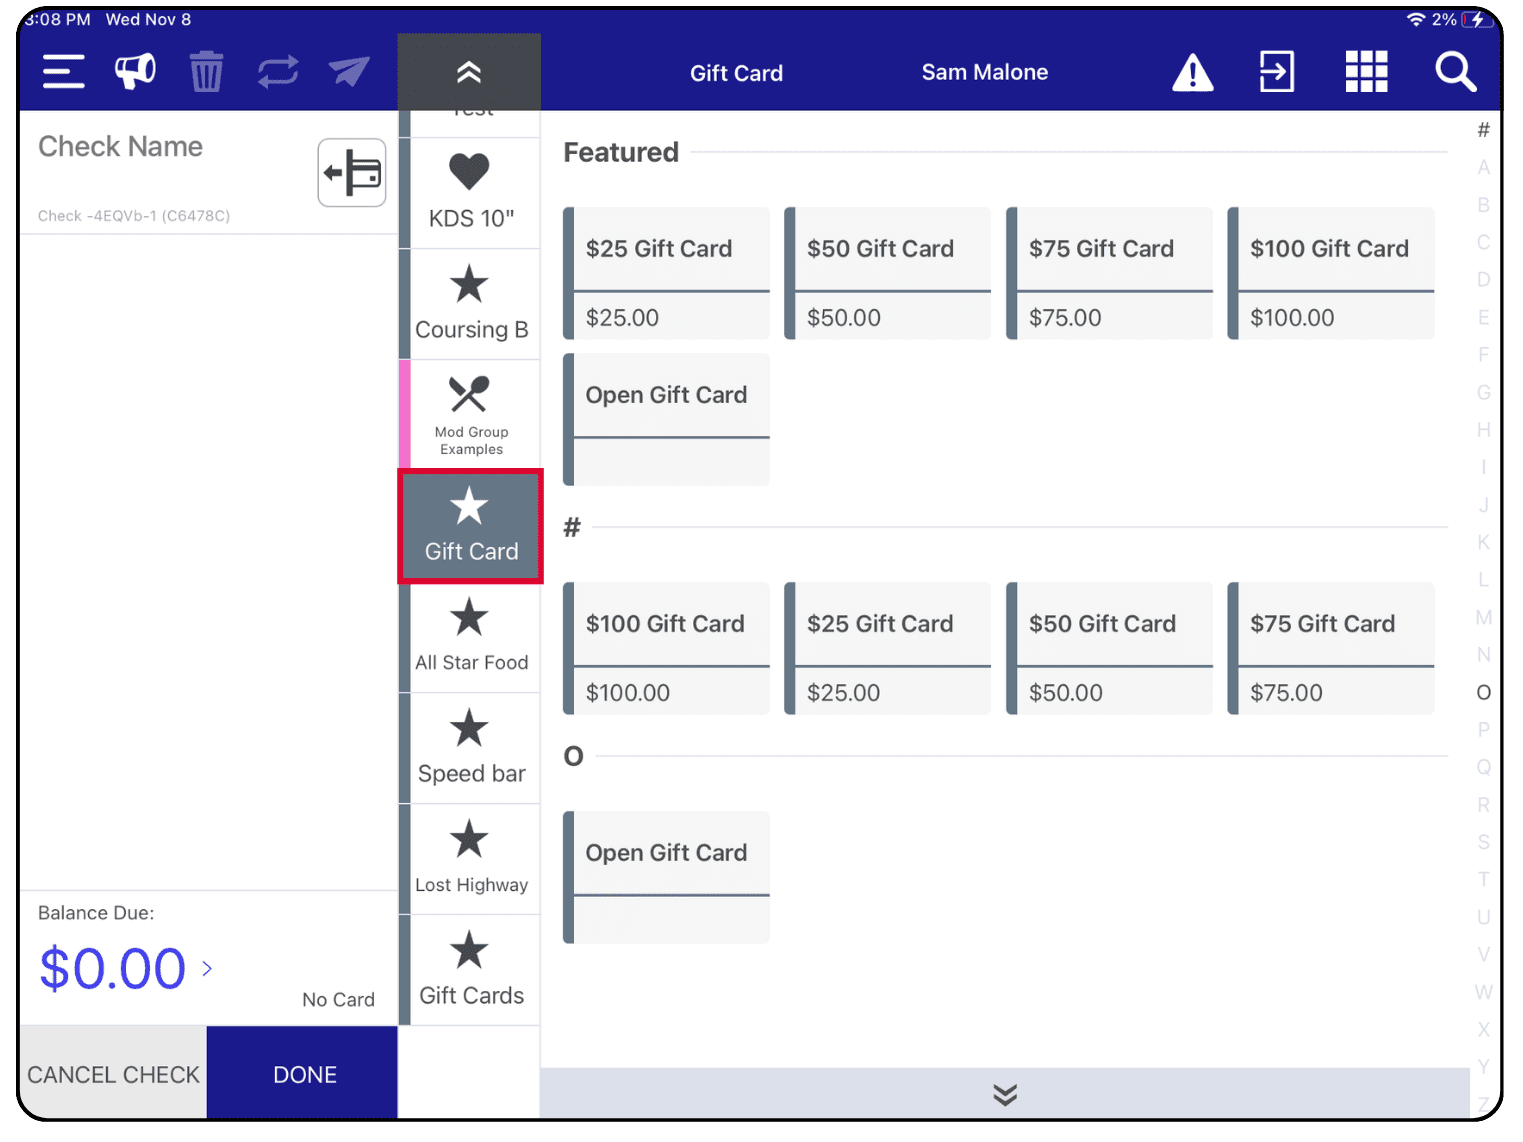
Issuing a new gift card:
In the tab, find the ‘Gift Card’ option from the dropdown item menu.
Click on ‘Gift Card’ to add it to the check.
Swipe the gift card or enter the number manually.
Add the desired funds to the card.
Complete the transaction and collect payment.
Click to zoom
Checking the balance of a gift card:
Click on the three lines in the upper left corner of the POS screen.
Scroll down until you see ‘Manage Gift Card.’
Select ‘Check Gift Card Balance.’
Swipe or manually key in the gift card number to view the card’s balance.
Click to zoom
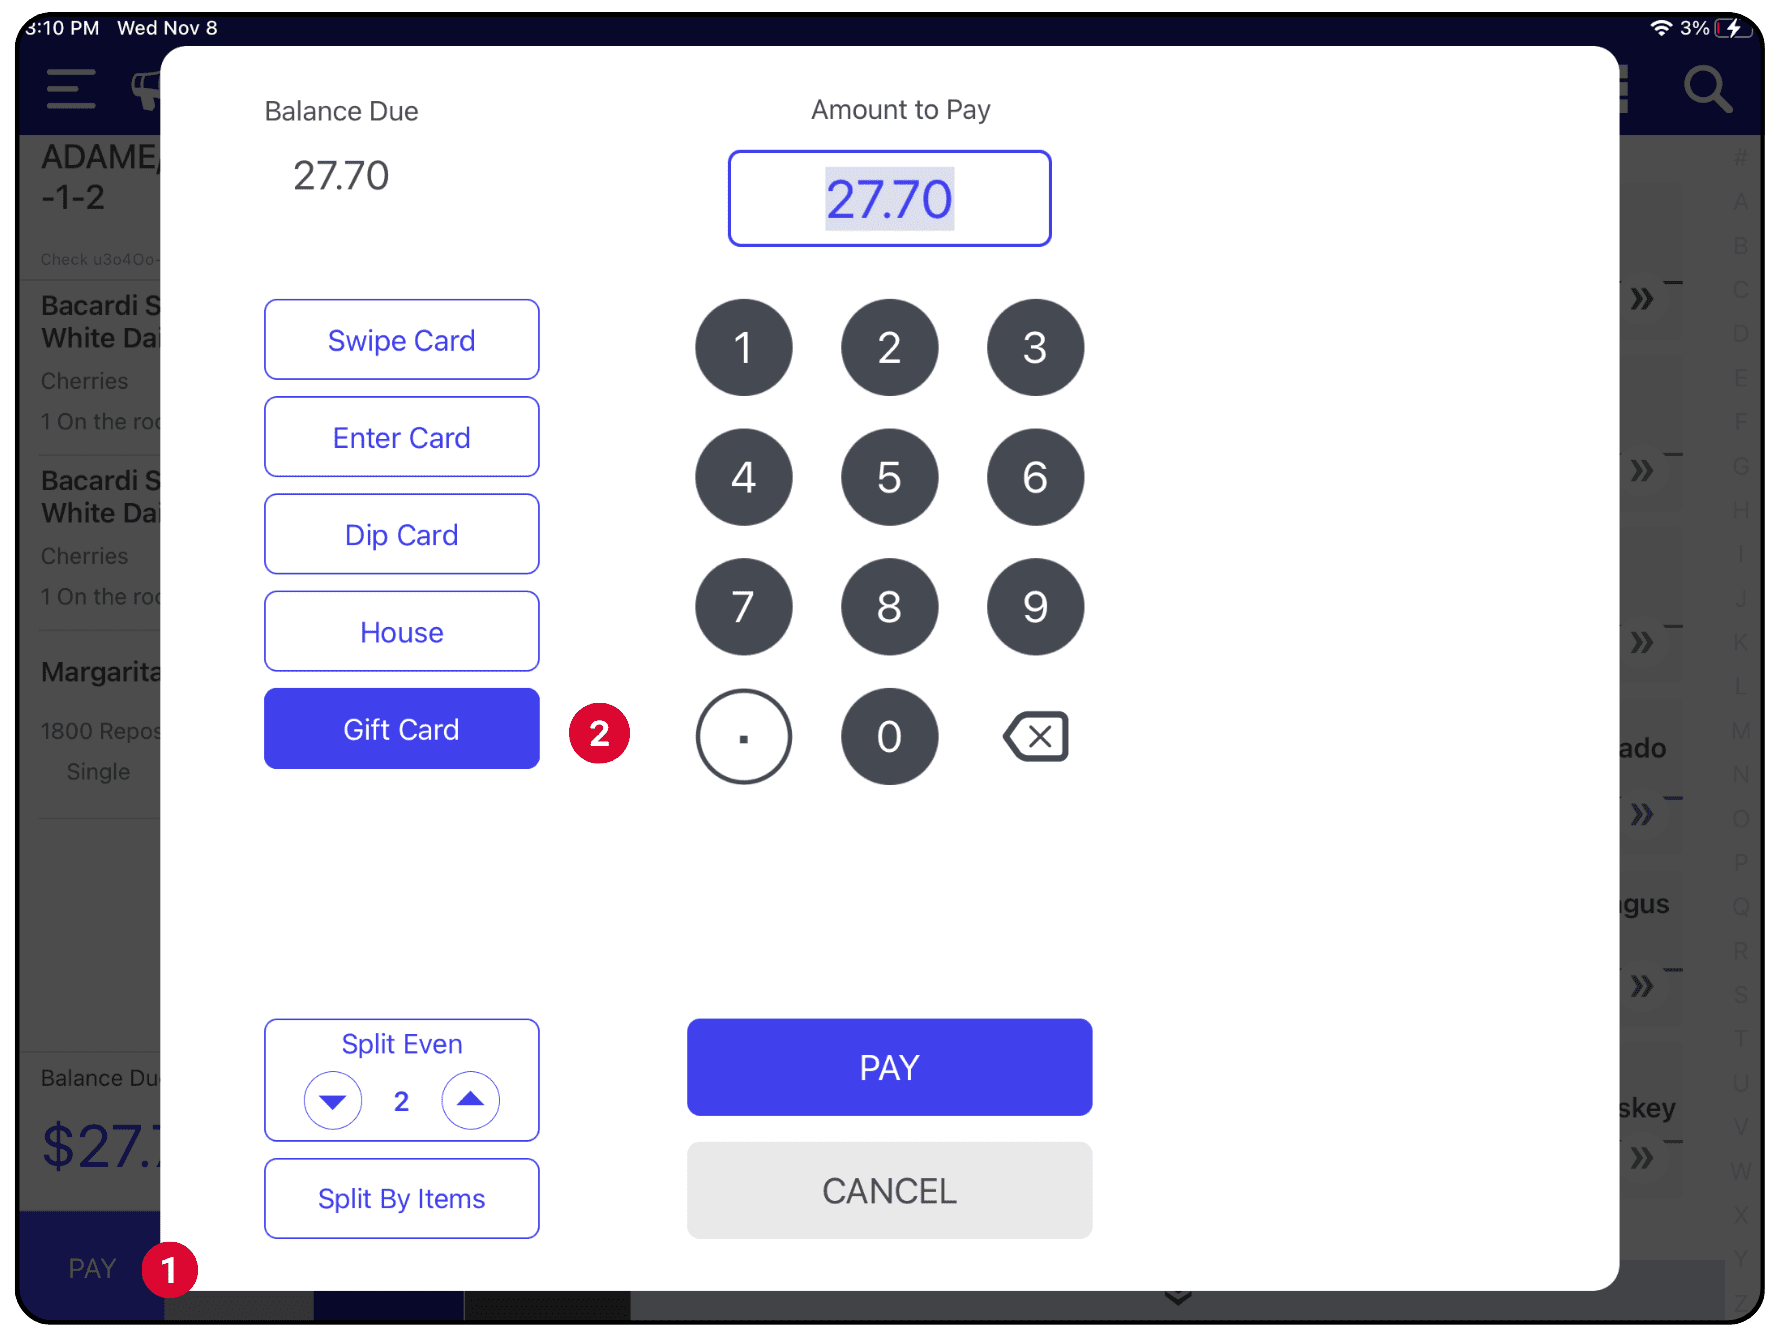
Accepting payment with a gift card:
When ready to close out a tab, select ‘Pay.’
Find the ‘Gift Card’ button from the payment options.
Swipe or manually key in the gift card number and close out the tab.
Click to zoom
Gift Card Updates to the Manager Portal
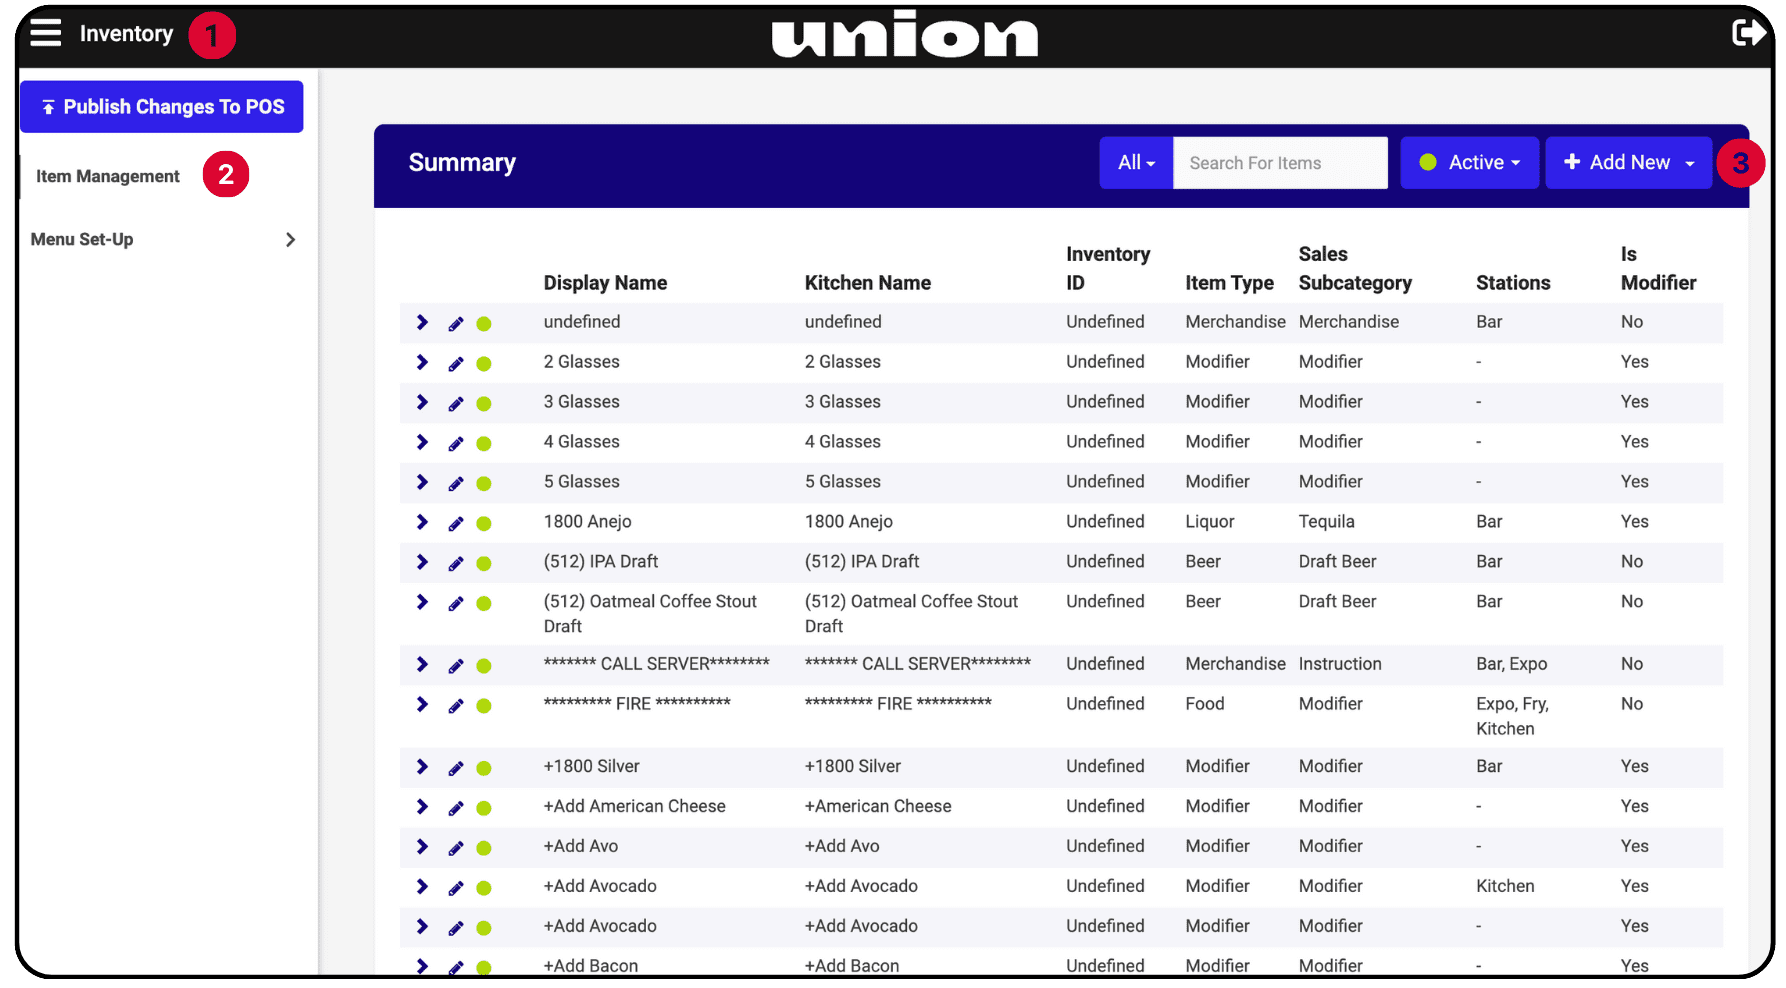
Adding gift cards to your 10” or 13” menu screen:
If you want to start selling gift cards at your venue, you must first attach them to your menu screen so they can be added to a tab and paid for. To do this:
Click the three lines in the top left corner of the Manager Portal.
Select ‘Inventory.’
Then ‘Item Management.’
In the item management page, click ‘Add New’ on the far right.
Finally, select ‘Gift Card’ from the dropdown menu.
Here, you will have the ability to add a gift card to your 13” or 10” screens.
Click to zoom
*Gift cards cannot be added to Union Mobile screens or POS on iPhone screens.
Customizing the default gift card amount:
When issuing a new gift card in the POS, there are preset amounts of $25, $50, $75, and $100. To customize these amounts:
Add gift cards to your menu through the instructions above
Navigate your way to back to the three lines.
Select ‘Inventory.’
Click on ‘Menu Set-Up.’
Then ‘Menu Screen’ from the dropdown list.
Once there, you will notice gift cards have been added to your menu screen.
Click on the edit icon next to ‘Gift Cards.’
You will then be directed to a page where you can customize your gift card amount.
Click to zoom
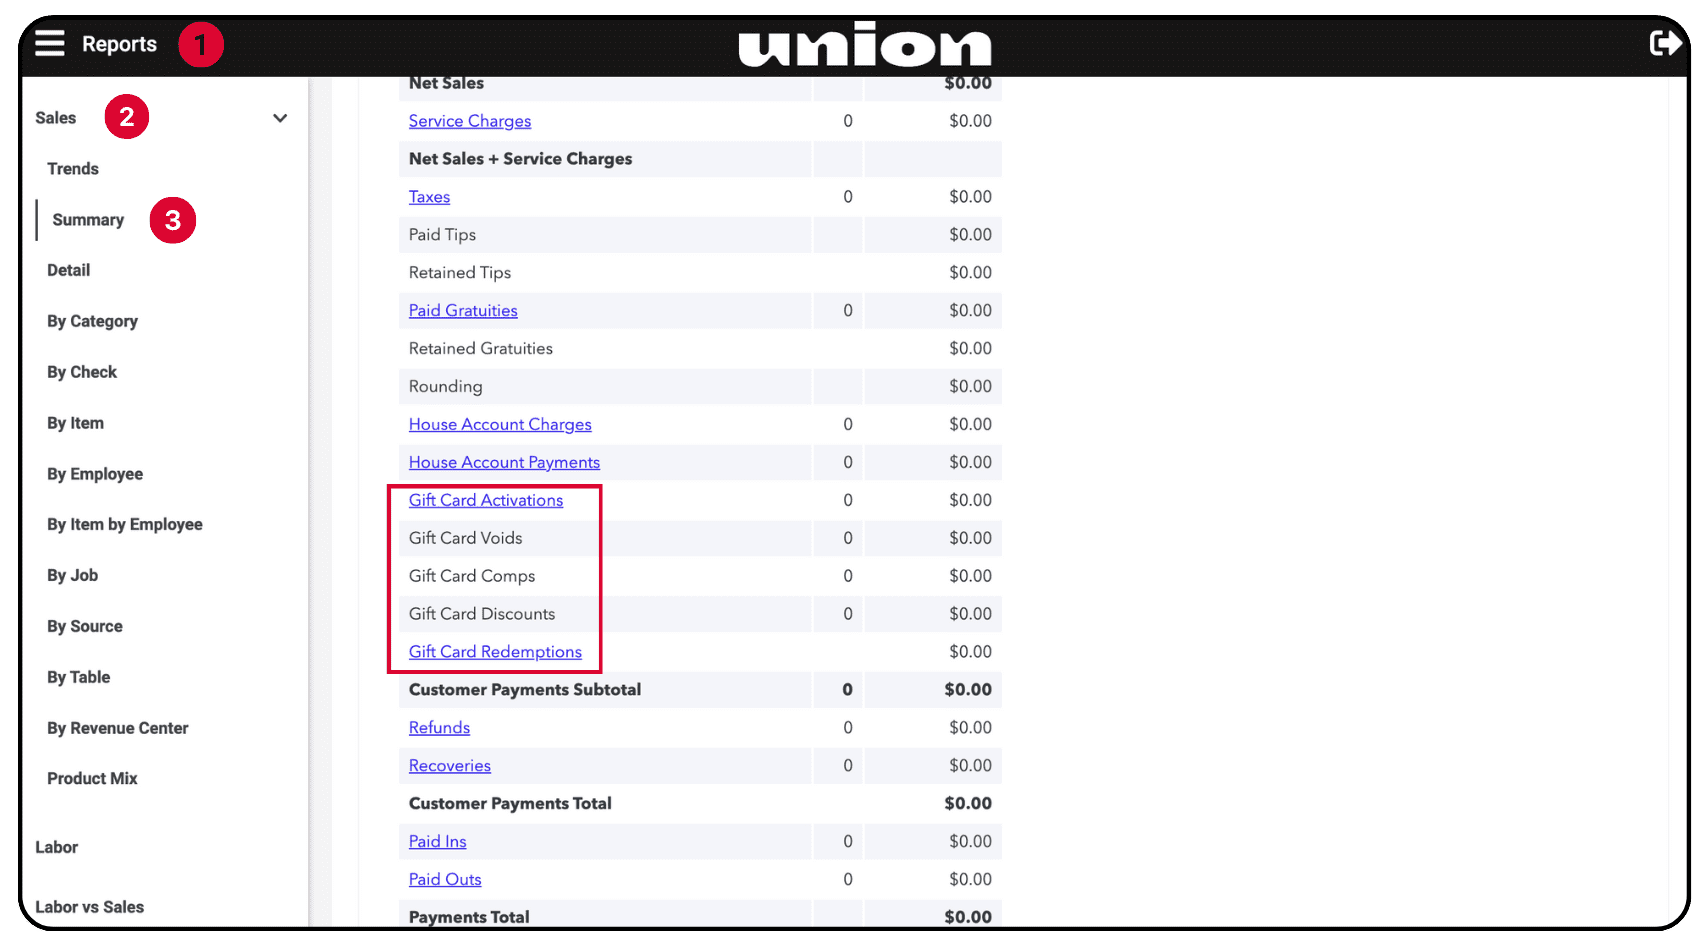
Gift card reporting:
Want to see the impact your gift card program is having on your business?
Click the three lines in the top left corner of the Manager Portal.
Select ‘Reports.’
Then ‘Sales.’
Then ‘Summary.’
On the sales summary page, you will see all relative information regarding gift card sales.
Click to zoom
*Important note: Gift cards are non-taxable items, they will not report in sales categories, in net sales, or gross sales.
Scan to Pay Settings
Scan to Pay lets customers use their smartphones to make digital payments by simply scanning a QR code, providing a quick and convenient way for customers to pay. It’s ideal for customers who forgot their wallet or prefer a digital payment option. With our new Scan to Pay settings, venues can now decide whether to include a QR code on a printed receipt, or as an accepted payment method for POS on iPhone.
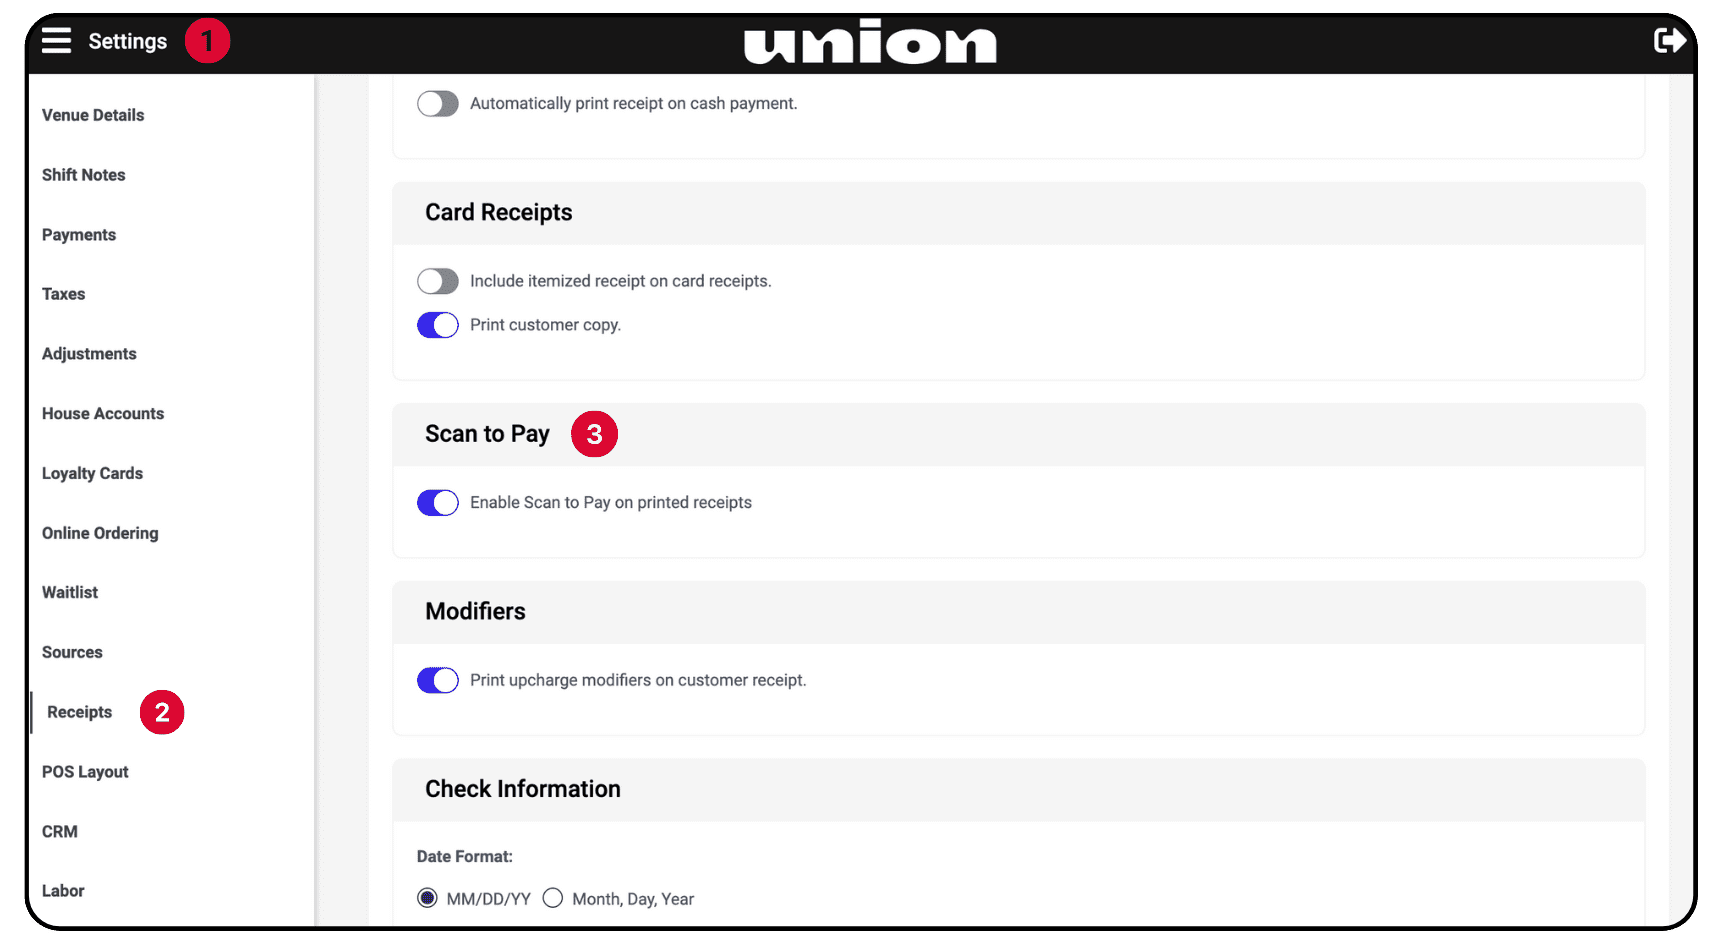
Enable Scan to Pay for printed receipts:
Navigate to the three lines menu in the top left corner of the Manager Portal.
Select ‘Receipts’
Scroll down to find the toggle that allows you to turn on Scan to Pay for printed receipts.
Click to zoom
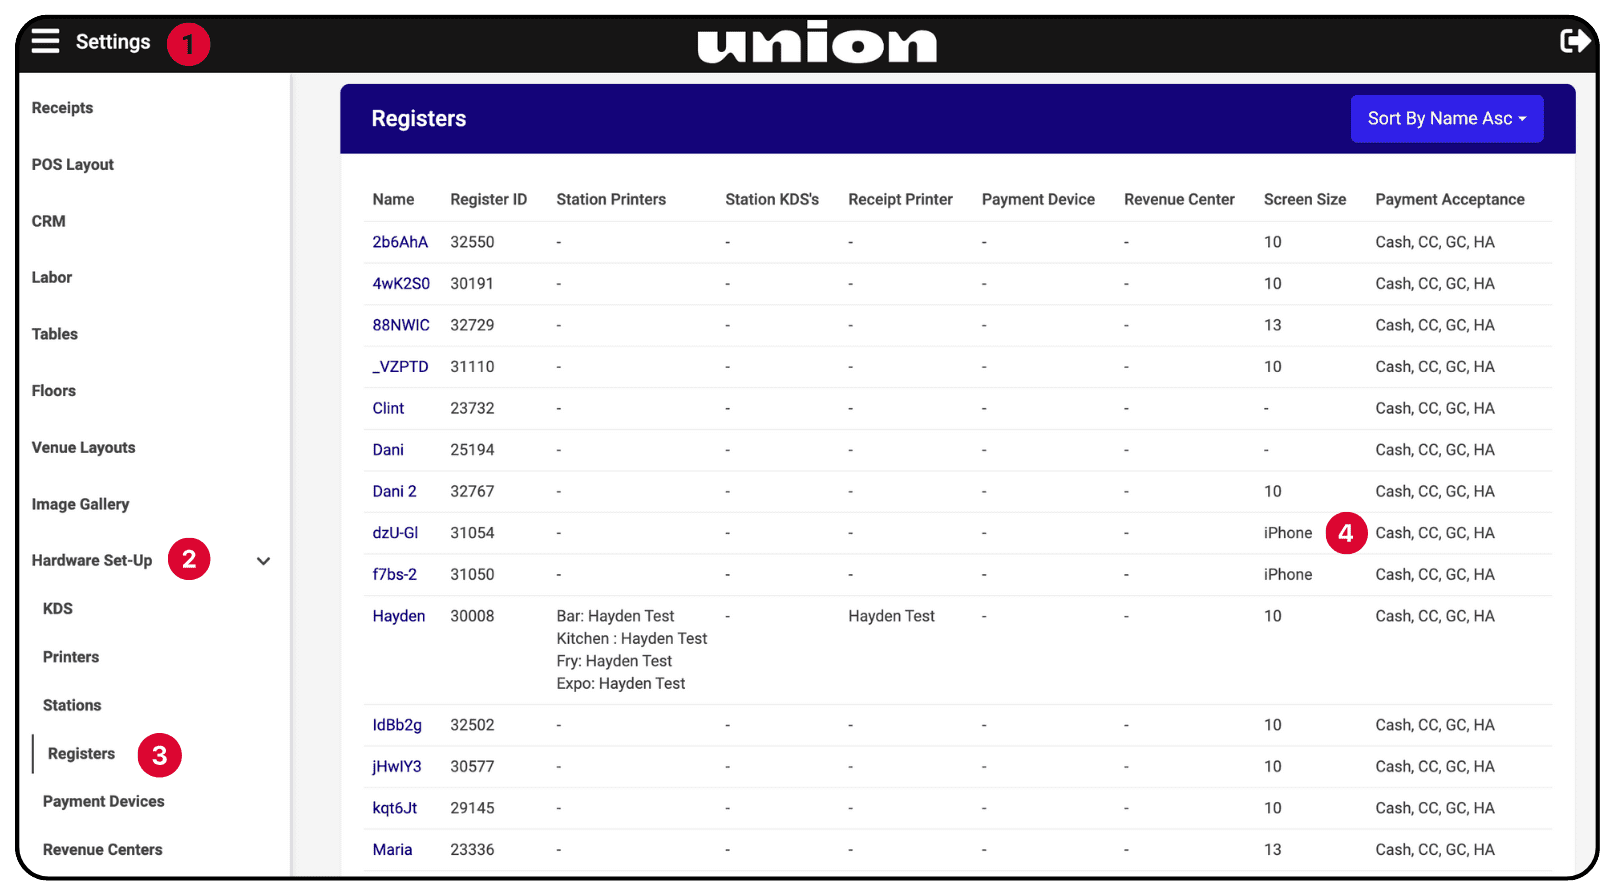
Enable Scan to Pay for POS on iPhone:
Navigate to the three lines menu in the top left corner of the Manager Portal.
Select ‘Settings.’
Click ‘Hardware Set-Up.’
Then ‘Registers.’
Select your specific iPhone you wish to enable Scan to Pay on.
Scroll down to find ‘Payment Acceptance For iPhone.’
Click the toggle for ‘Scan to Pay.’
Click to zoom
Employee Sales Tracker
Running an employee competition at your venue? Our new Sales By Item By Employee feature is a powerful tool that’s not only crucial for internal employee competitions, but also integral for thorough auditing. Our new update allows you to effortlessly track and analyze which specific items your employees have sold over a designated period of time.
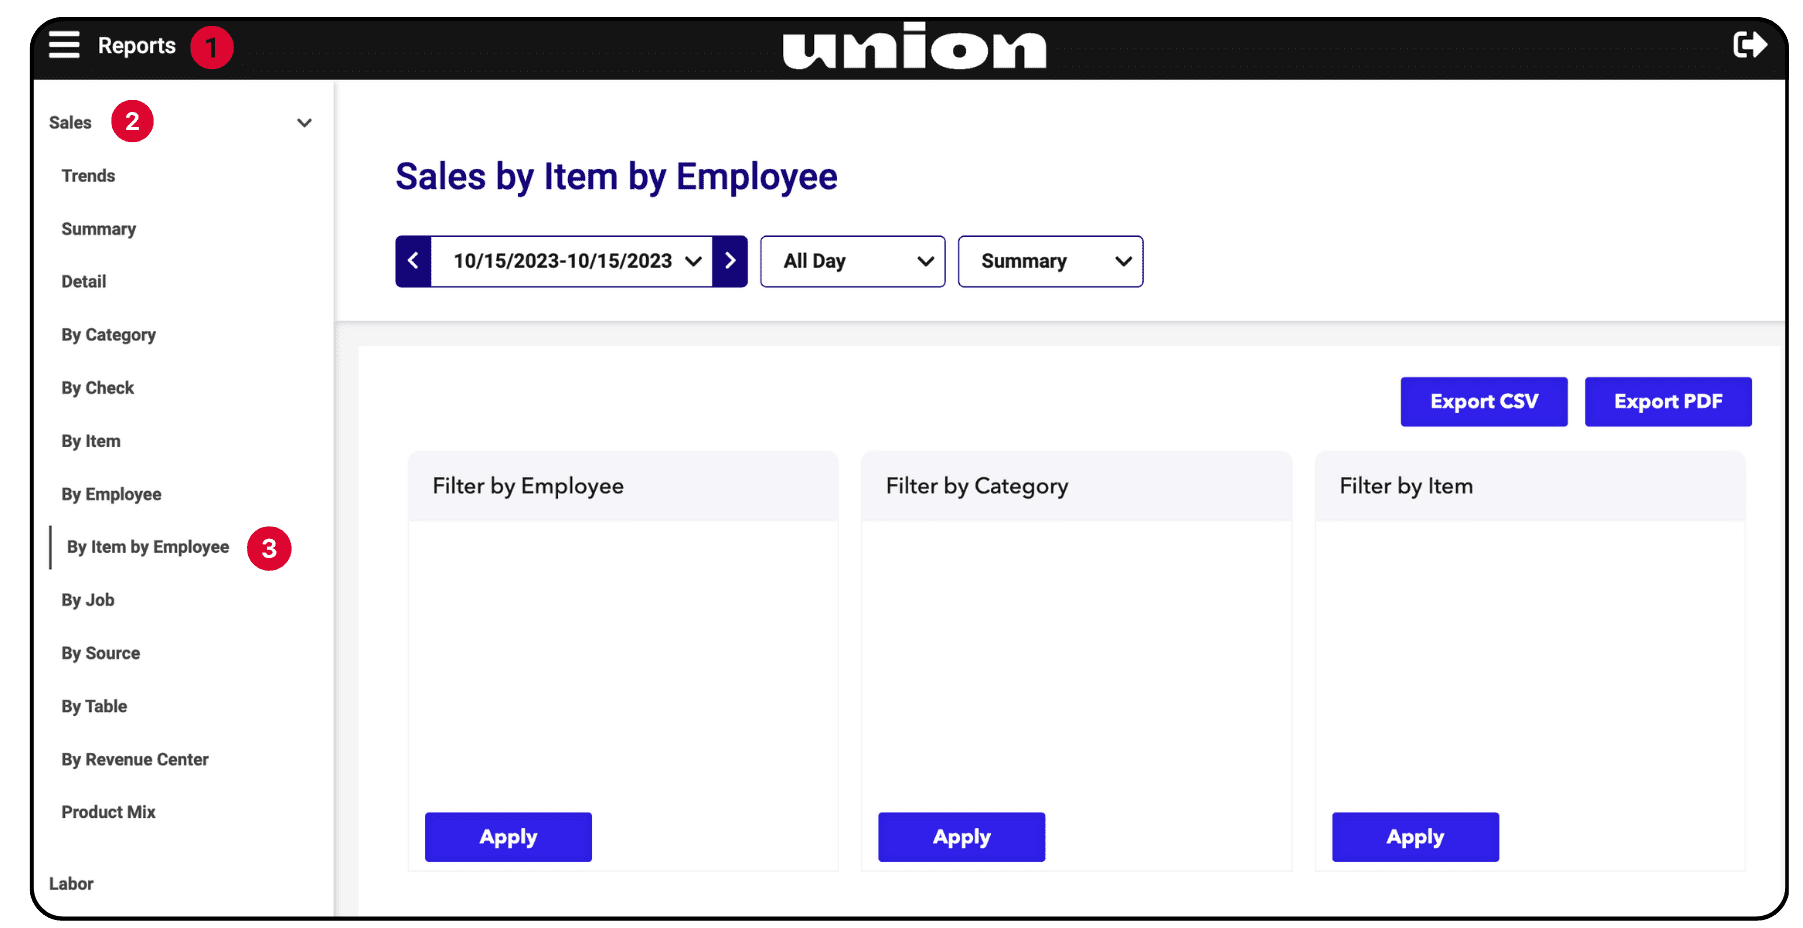
To view Sales By Item By Employee:
Navigate to the three lines menu in the top left corner of the Manager Portal.
Select ‘Reports.’
Select ‘Sales.’
Then from the dropdown menu, click ‘By Item By Employee.’
Scroll down to find the toggle that allows you to turn on Scan to Pay for printed receipts.
Click to zoom
Customized Menu Items
Want to offer your customers a cocktail in various sizes and tailored with distinct modifiers? Our new feature empowers venues with the ability to seamlessly incorporate sizes and modifiers for every item on your menu, providing unparalleled control over your offerings.
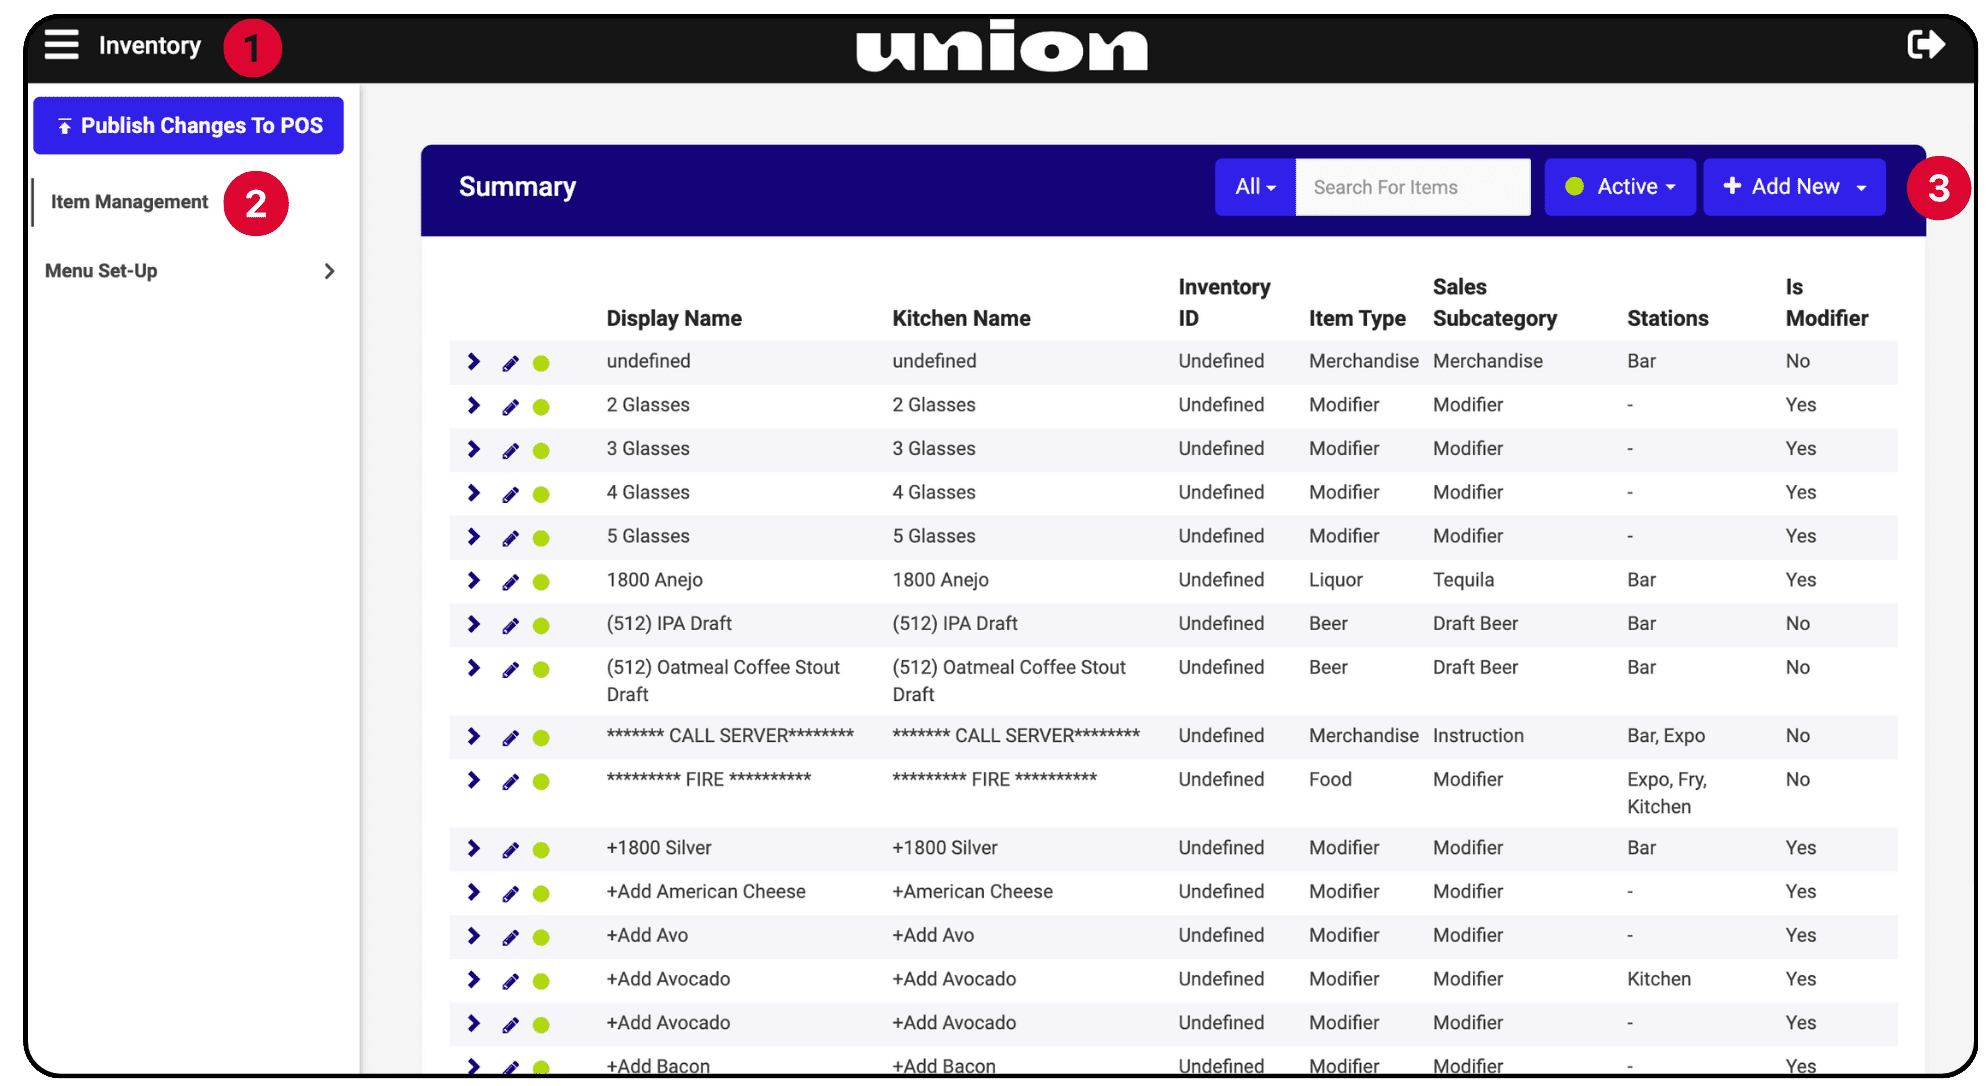
To add sizes and modifiers to your menu items:
Navigate to the three lines menu in the top left corner of the Manager Portal.
Select ‘Inventory.’
Select ‘Item Management.’
In the top right corner click ‘Add New.’
Simply select the item you wish to add sizes or modifiers to.
Click to zoom
Have an idea for a new feature?
Submit a feature request and help make our product even better!